

I have used Techsmith’s Camtasia and Snagit for several years. For the most part I have used them to produce tutorial screen casts. Over the years, Camtasia has added features that rival consumer level video editors, such as Adobe’s Premiere Elements.
Much of my photography is centered around taking videos and photos of my granddaughters competing in sports. On a recent weekend, I videoed Lucy in one of her soccer games as the goalkeeper.
I decided to use Camtasia 2019 to produce the final video. However, I took multiple steps and programs to create the final short video.
Here is what I did.
Shooting the video Clips
-
For this project I used my Sony AX53 Camcorder to take the 1080p video.
-
This camera is lighter and easier to hold for extended periods than my Canon 7D Mk 2. Since Lucy is a goalkeeper, much of the time the action does not involve her. I keep her roughly in the frame as I watch the game. When she tenses and begins to prepare for action, I begin the video.
-
Doing this I end up with a large number of short video clips by the end of the game.
-
Post Processing
-
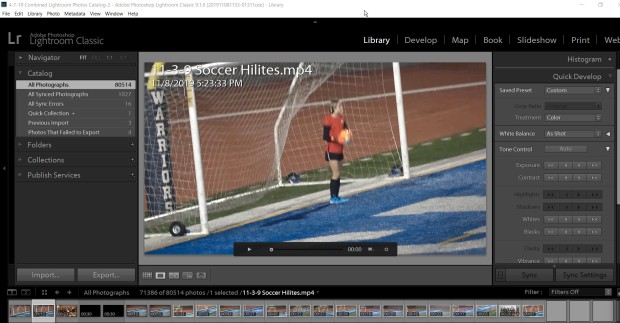
I used Lightroom Classic to Import and then add Keyword tags to all of the video clips.
-
Then using the Picks and Rejects flags I identified those that are not worth retaining. This is the vast majority. I deleted them.
-
Then I used the Star Rating system of Lightroom Classic to identify just those very few clips that I wanted to include in the current project.
-
My camcorder did a pretty good job of recording the raw video. However, for each clip I used Lightroom Classic’s Quick Develop mode within the Library module, and selected Auto Tone. This brightened up each clip. Lightroom Classic is not optimized for video editing, but it does do a nice job here.

-
I used Premiere Elements 2020 to convert two of the clips to slow motion, since the action was too fast to follow easily.
-
I saved the edited clips back into the same folder the original clips are stored, but with new names. And then I Imported them into Lightroom Classic and tagged them accordingly.
-
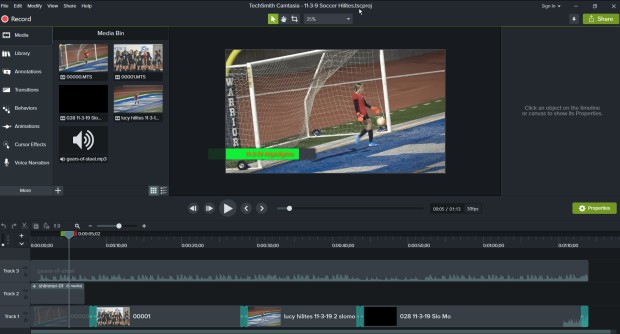
At this point, I would normally finish the project by adding transitions, titles etc using Premiere Elements 2020, but this time, I chose to use Camtasia 2019 to finish my project.
-
Specifically, I did the following in Camtasia 2019:
-
Imported the four clips to a single track.
-
Added Transitions and adjusted their duration. I used a couple of different transitions.
-
Added lower thirds title for the video, customizing it a bit from the default.
-
I added a music background and deleted the audio that my camcorder originally recorded, except at the very end of the video, which I thought was cool. The music I added came from Techsmith’s selection of free music.
-
Finally, I saved the project as an MP4 HD 1080p video file on my hard drive.
-
So for this project, I used three separate programs. Lightroom Classic is pretty unique here in what it does. However, I could have used Premiere Elements 2020 to do everything that I did in Camtasia 2019. I could have also converted the slow motion clips with in Camtasia 2019 instead of Premiere Elements 2020, but the process would have been harder.
So, I often find in creating a video project, I end up using multiple programs. And remember, the features of Camtasia 2019 for this simple project only scratched the surface of its capabilities. In future projects, I will explore more of what it can do.
CLICK HERE to see the resulting video.
If you liked this post, give it a LIKE, Ok?
Until next time…

Great job I still follow you when I can Karen
Sent from my iPhone
>
LikeLike
Wow, Karen! It’s been a long time. If you ever have time shoot me an email and let me know what’s up.
LikeLike